Corny? Yes…But that’s pretty much me in a nutshell–corny and a little bit nutty.
WOOD LETTERS TUTORIAL!!! (Did you say that out loud like the UFC’s Bruce Buffer? Cause I did. You should, too.)
Soooo….Other people spend 2 hours at a time in Joann Fabrics, right? I have a lot of projects to hit you with, but this is the first one I finished. It was so easy! I decided that I do not have enough fall decorations. I’m sure the truth is that I have more than the average Joe, but I’m nutty…remember?
Joann’s sells plain wood letters that you can finish anyway you’d like. I bought white ones that can stand by themselves. I believe they were under $2/piece, but I bought them on sale. At first I grabbed the letters “B” “O” and “O”, but then I decided it would be smarter to get something with a longer decor run. I’ll keep my fall stuff up until I decorate for Christmas. I waltzed back to the area with the wood letters and pulled out the letters to spell “fall”. Hubby and I stood in the aisle and debated for quite some time. You see, I think the “F” looks like an “E”. He reminded me that I was nuts. I really wanted “fall” instead of “boo” so I let him talk me into it. Now that they’re finished, I like the “F” so much better. I decided to decorate them with scrapbook paper and some sort of embellishment. At first I thought I’d adhere the paper with modge podge, but that stuff makes me nervous. I decided to go with spray adhesive, and I am super happy with my decision. It was so quick and easy!
Here’s what I did!
Step 1: Choose your letters.
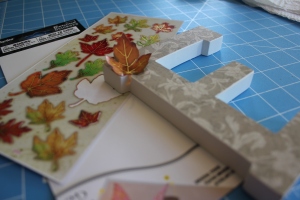
Step 2: Choose scrapbook paper and embellishments. (I went with 3D leaf stickers. Did you know they made 3D stickers?!)
Step 3: Take paper and turn over to the “wrong” side. Do the same with the wood letter.
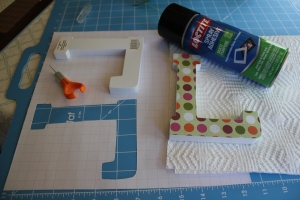
Step 4: Carefully use exacto knife to trace along the edges of each letter.
Step 5: Cover the front of the letter with spray adhesive and smooth on the paper.
Step 6: Add the stickers and bend up the sides.

Step 7: That’s it! Line up your letters and admire! So.fracking.easy! Pretty sure I’ll need to make a set for each holiday…

I linked up at:
Making the World Cuter
Skip to My Lou (link on my side bar)


Very cute idea! I might have to borrow your idea for a fall-tastic monogram above my fireplace.
Borrow away! God knows I “stole” it from someone else. 😉
Yay pinterest!
I really want to make some of these. I found you through a comment you left at Happy Home Fairy. Love all your crafts.
Oh, thank you so much!!
They were so easy! I highly suggest this craft!
I made a set and took a picture. I posted it to my blog and linked to yours for the idea. Thanks! I used papier’ mache’ letters and had to balance the F against some potted silk flowers.
love it! found you via craftomaniac!
hope you’ll enter my giveaway:
http://hellolovelyinc.blogspot.com/2011/10/more-stencil-splendor-giveaway.html
michele
Really cute letters. I love your embellishments. I would love for you to share this project on my Inspiration Board {link party}. I know my readers would really enjoy it. Thanks!
http://carolynshomework.blogspot.com/2011/10/inspiration-board-link-party-18.html
carolyn – homework
Thanks for the invite! I jumped over there and linked up! 🙂
Such a cute idea! I love the paper that you chose! Super cute!